How to deploy vRealize Orchestrator 7.0
vRealize Orchestrator (previously known as vCenter Orchestrator) allows you to design and deploy scalable workflows to automate IT processes. Here is VMware’s description of the product:
Simplify the automation of complex IT tasks with VMware vRealize Orchestrator, which integrates with vRealize Suite and vCloud Suite to further improve service delivery efficiency, operational management and IT agility. Source: vRealize Orchestrator
If this is a tool that you haven’t used yet, this can really make those complex tasks easier to execute. I suggest you give it a try as there is no cost involved either! J
Install Guide
You can install vRealize Orchestrator as a 64-bit Windows Machine or as a Virtual Appliance. For this deployment we will install the Virtual Appliance.
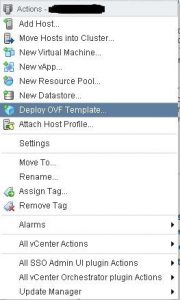
You will need to download the OVA from My VMware. Once you have the OVA downloaded log in to the vSphere Web Client with Administrator privileges and navigate to the parent object of your choice, which will be either your compute cluster or ESXi host, right click and select “Deploy OVF Template..”
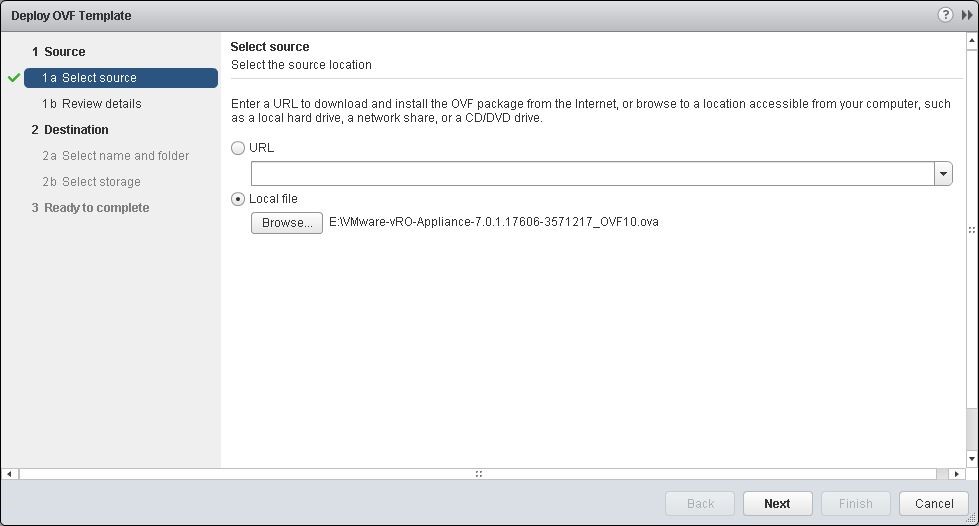
Select “Browse..” and select the OVA file downloaded from My VMware.
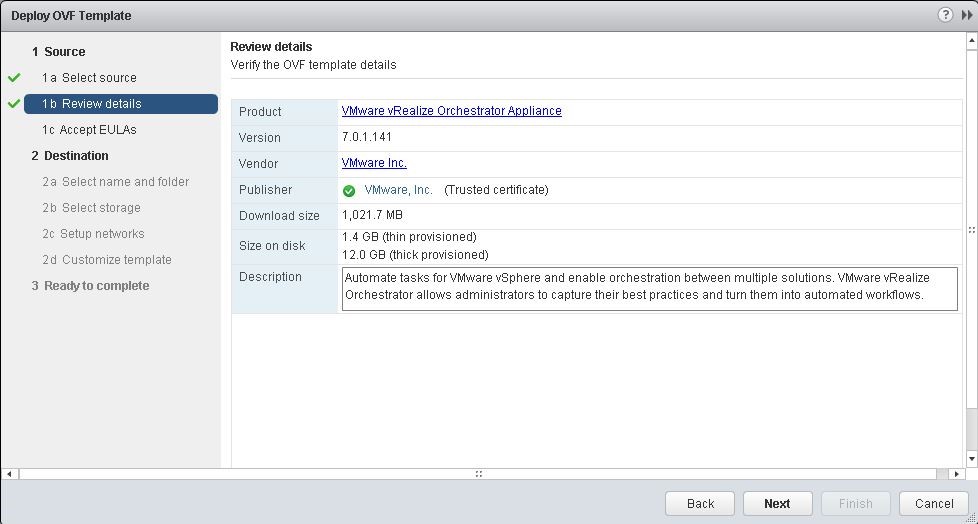
Click Next and review the details.
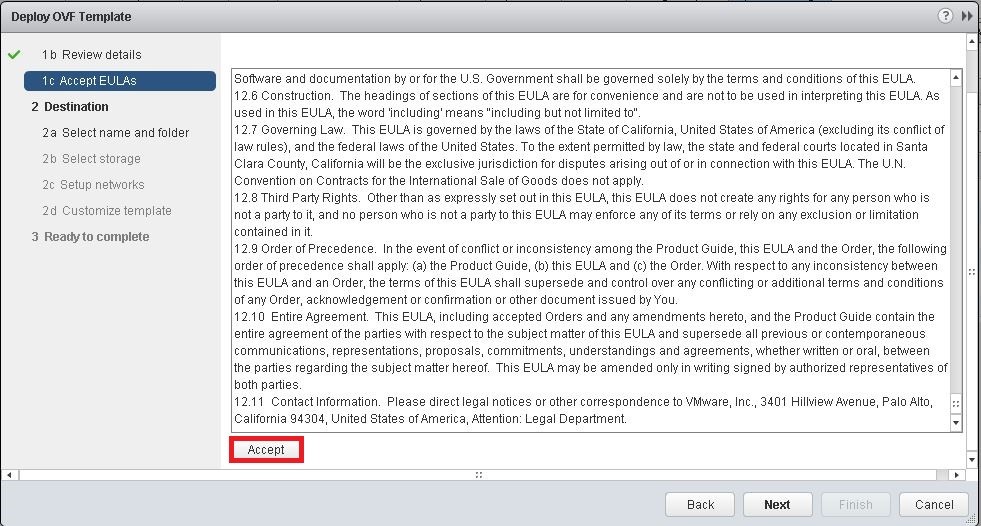
Click Next to take you to the EULA (end User License Agreement). Here you will need to accept the EULA to progress the installation.
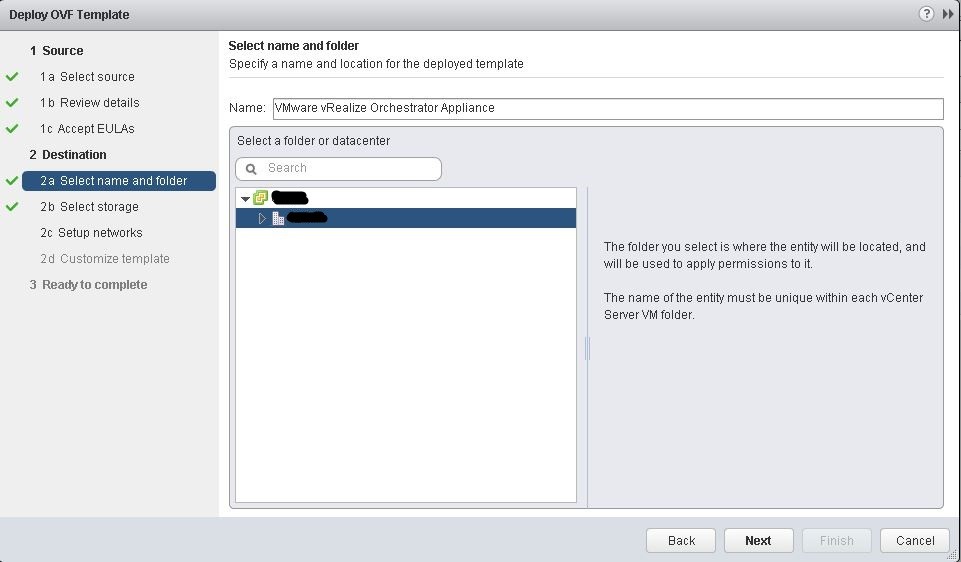
Click Next. Here we select the name and location of the appliance. For this demonstration we are just going to install it to the root of the datacenter and leave the name as “VMware vRealize Orchestrator Appliance” for this demonstration. I advise you select a more suitable location for your environment.
Click Next and now select your storage locations and virtual disk format. Once selected Click Next
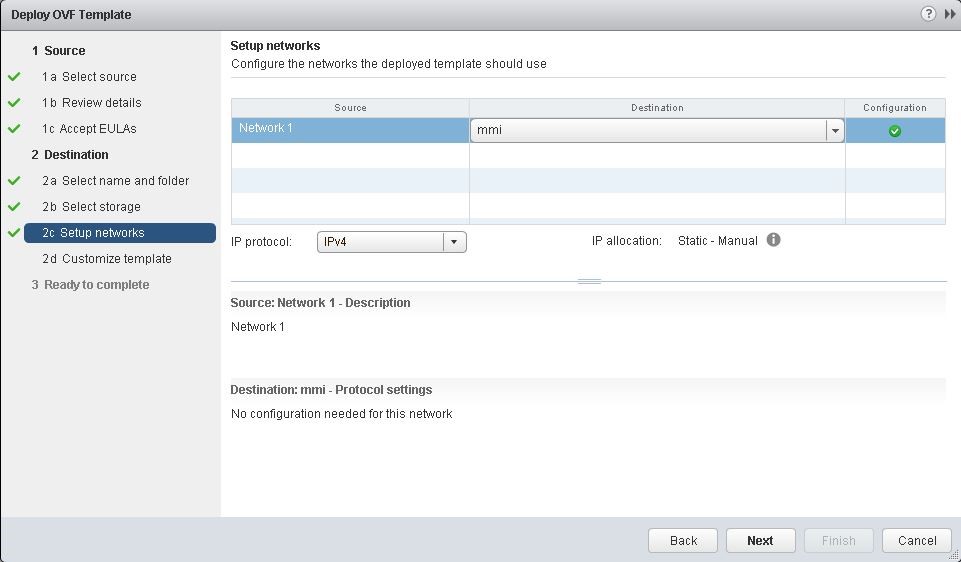
Select your network you wish to place the appliance and then click Next
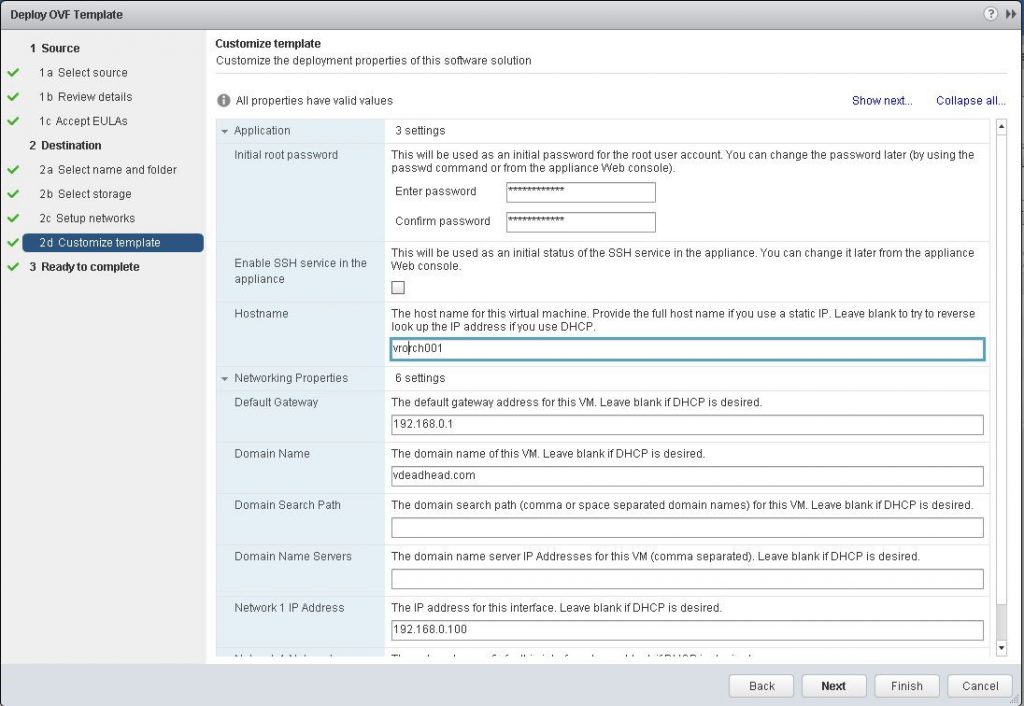
Here we set the root password, hostname, and IP configuration. Once completed click Next, review all settings and click Finish.
Appliance Configuration Guide
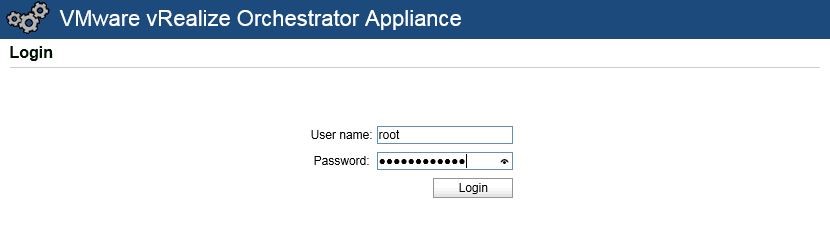
Open a web browser and navigate to https://<IP-or-FQDNofappliance>:5480 and log in with the root credentials set on the deployment.
Select the Admin tab and click on Time Settings. Select the Use Time Server radio button and enter the details for your NTP server(s).
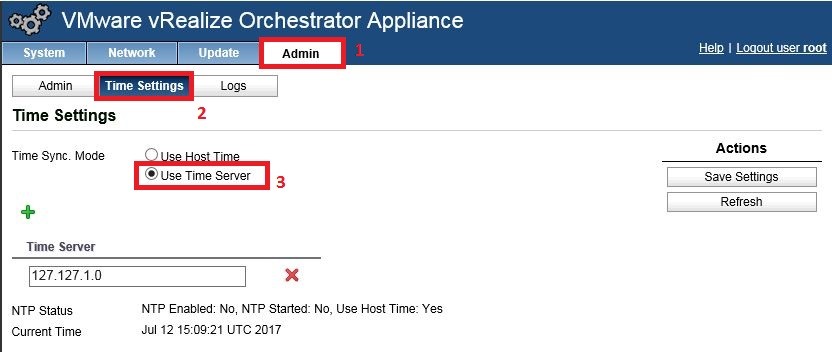
Once selected click Save Settings.
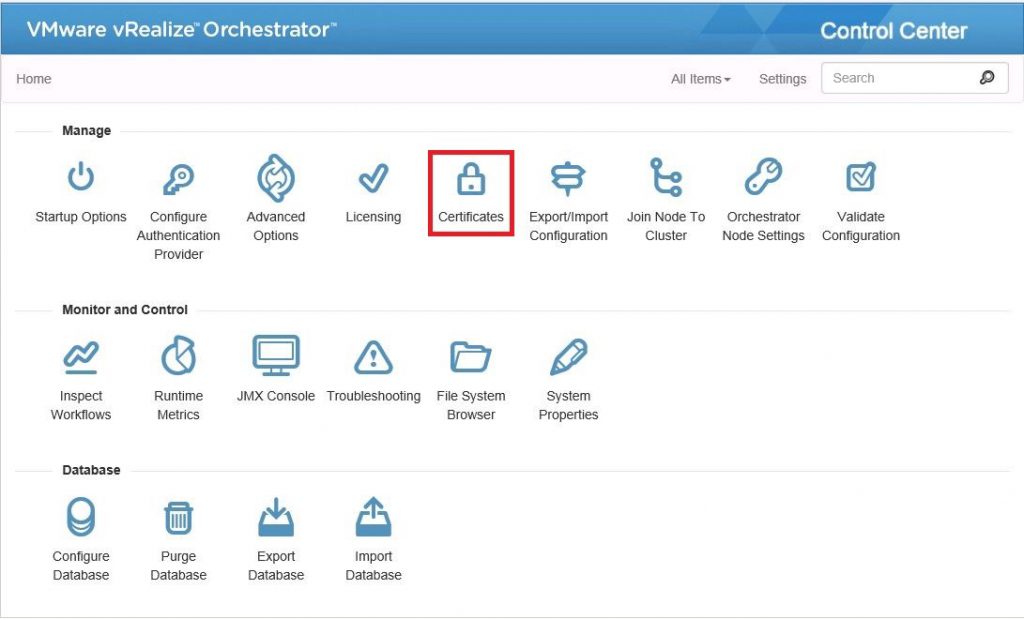
From the web browser navigate to https://<IP-or-FQDNofappliance>:8283/vco-controlcenter/ this will take you to the Orchestrator control center page from here you want to select Manage>Certificates.
From the Trusted Certificate tab select Import then Import from URL
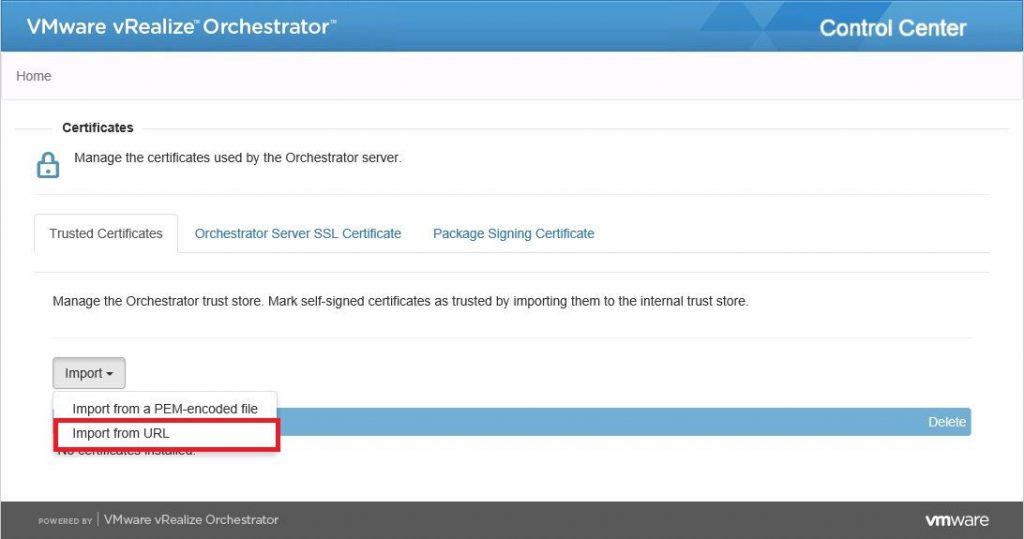
Enter the FQDN of your vCenter server and select import to import the returned certificate. To configure authentication select Manage>Configure Authentication Provider. Enter the FQDN of your vCenter and click Connect. You will then be asking for credentials of your SSO Admin account. Enter the SSO Admin credentials and click Register. You will be asked to enter an Administration group, search for the “vsphere.local\Administrator” group and select Save.
Any questions leave a comment in the comment section below.